Gimp Change Size Dimentions Scale Quality
Changing the Size (Dimensions) of an Image (Scale)
It’s a common problem that you may have an image that is too large for a particular purpose (embedding in a webpage, posting somewhere online, or including in an email for instance). In this case you will often want to scalethe image down to a smaller size more suitable for your use.
This is a very simple task to accomplish in GIMP easily.
The image we’ll be using to illustrate this with is The Horsehead Nebula in Infrared.
When you first open your image in GIMP, chances are that the image will be zoomed so that the entire image fits in your canvas. The thing to notice for this example is that by default the window decoration at the top of GIMP will show you some information about the image.
View of the GIMP canvas, with information at the top of the window.
Notice that the information at the top of the window shows the current pixel dimensions of the image (in this case, the pixel size is 1225×1280).
To resize the image to new dimensions, we need only invoke the Scale Image dialog:
This will then open the Scale Image dialog:
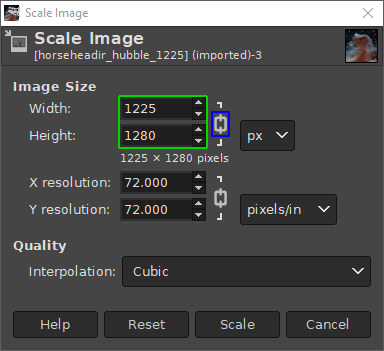
The Scale Image dialog.
In the Scale Image dialog, you’ll find a place to enter new values for Width and Height. If you know one of the new dimensions you’d like for the image, fill in the appropriate one here.
You’ll also notice a small chain just to the right of the Width and Height entry boxes. This icon shows that the Width and Height values are locked with respect to each other, meaning that changing one value will cause the other to change in order to keep the same aspect ratio (no strange compression or stretching in the image).
For example, if you knew that you wanted your image to have a new width of 600px, you can enter that value in theWidth input, and the Height will automatically change to maintain the aspect ratio of the image:
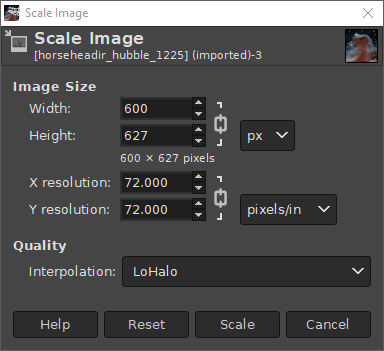
Changing the Width to 600px.
As you can see, entering 600px for the width automatically changes the height to 627px.
Also notice I have shown a different option under Quality → Interpolation. The default value for this is Cubic, but to retain the best quality it would better to use Sinc (Lanczos3).
If you want to specify a new size using a different type of value (other than Pixel size), you can change the type by clicking on the “px” spinner:
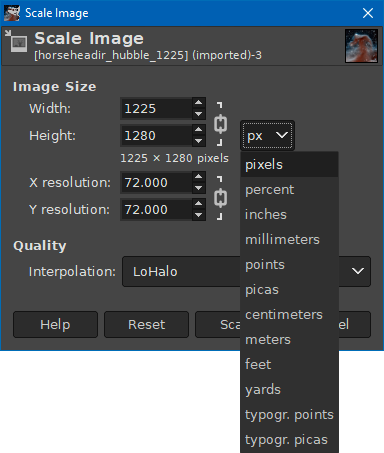
Changing input value types.
A common use for this could be if you wanted to specify a new size as a percentage of the old one. In this case you could change to “percent”, and then enter 50 in either field to scale the image in half.
Once you are done scaling the image, don’t forget to export the changes you’ve made:
to export as a new filename, or:
to overwrite the original file (use caution).
For more detail about using Scale Image, you can see the documentation.
Changing the Size (Filesize) of a JPEG
You can also modify the filesize of an image when exporting it to a format like JPEG. JPEG is a lossy compression algorithm, meaning that when saving images to the JPEG format, you will sacrifice some image quality to gain a smaller filesize.
Using the same Horsehead Nebula image from above, I have resized it to 200px wide (see above), and exported it using different levels of JPEG compression:
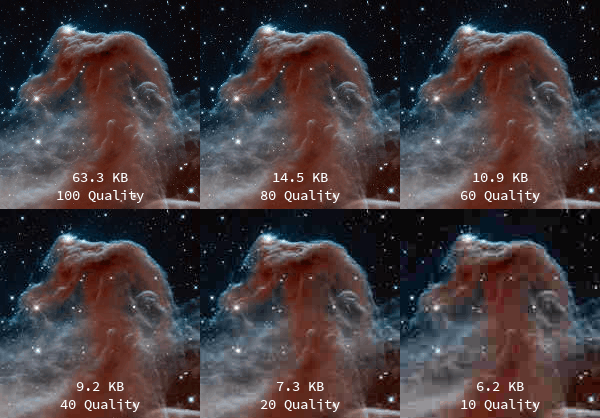
Comparison of different JPEG compression levels.
As you can see, even at a quality setting of 80, the image is significantly smaller in filesize (77% size reduction), while the image quality is still quite reasonable.
When you’ve finished any image modifications you are doing, and are ready to export, simply invoke the export dialog with:
This will invoke the Export Image dialog:
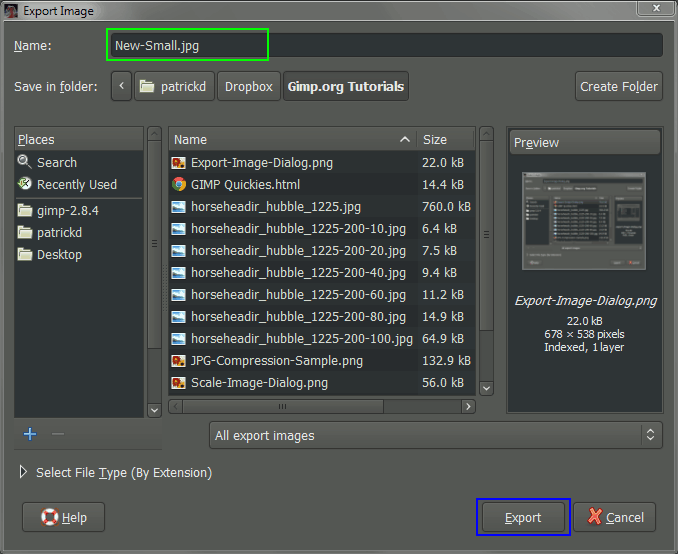
You can now enter a new name for your file here. If you include the filetype extension (in this case, .jpg), GIMP will automatically try to export in that file format for you. Here I am exporting the image as a JPEG file.
You can also navigate to a new location on your computer through the Places pane, if you need to export the file to a different location. When you are ready to export the image, just hit the Export button.
This will then bring up the Export Image as JPEG dialog, where you can change the quality of the export:
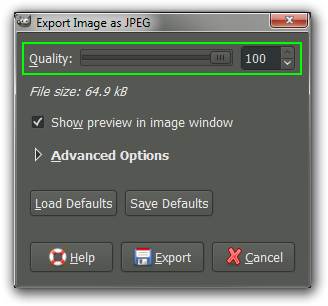
From this dialog you can now change the quality of the export. If you also have the “Show preview in image window” option checked, the image on the canvas will update to reflect the quality value you input. This will also enable the “File size:” information to tell you what the resulting file size will be. (You may need to move some windows around to view the preview on the canvas in the background).
When you are happy with the results, hit the Export button to export.
To see more details about exporting different image formats, see Getting Images out of GIMP in the manual.
- Log in to post comments
- 3307 reads