How To Use CKEDITOR with IMCE for Drupal


CKEditor is an online rich text editor that can be embedded inside web pages. It is a WYSIWYG (What You See Is What You Get) editor which means that the text edited in it looks as similar as possible to the results end users will see after the document gets published. It brings to the Web popular editing features found in desktop word processors such as Microsoft Word and OpenOffice.org Writer.

All you need, in a unique solution

CKEditor provides all features and benefits users and developers expect from modern web applications. Its amazing performance keeps users focused on things to be done. CKEditor includes all popular features available in text editors as well as additional components specially designed for web contents.

Fully compatible

One of the strongest features of CKEditor is its almost unlimited compatibility. It's a JavaScript application, so it simply works with all server technologies, just like a basic textarea element. As far as the client side is concerned, CKEditor has been developed to be compatible with all browsers that dominate the market, namely Internet Explorer, Mozilla Firefox, Google Chrome, Safari, and Opera. It will even work in the infamous Internet Explorer 6!

It's simply the best

We are not claiming that CKEditor is the best editor there is. Our customers and community are saying that, loudly. People enjoy working with the editor, fully trusting it, backed up by our strong and longtime market presence. Visit the CKEditor web site to know more about it, play with the demo and enjoy it!


We're not affirming that CKEditor is the best editor out there. Our customers and community are saying that, loudly. People enjoy working with this editor, fully trusting it, backed up by our strong and long time market presence. Visit the CKEditor web site to know more about it, and enjoy it!

CKEDITOR Users Guide

Adding Images From Your Desktop

The first step is to go to the CKEDITOR toolbar and click on the image icon 

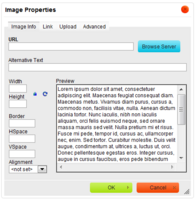
The following dialog box, titled "Image Properties", will appear:

Click the blue "Browse Server button, which will lead you to the next dialog box:

Click "Upload" and the "File" dialog box will appear:

Click "Browse" and find the desired image file on your computer

If you wish to create a thumbnail, click the desired checkbox, then click Upload.

The previous dialog box will appear again, but this time your uploaded images files will be listed and highlighted, as follows:

Double Click the desired image file. The "Image Properties" dialog box will appear again, but this time it will contain information about the chosen image file:

The selected image can be resized simply by changing the Width or Height. If you change one, the value for the other will change so that the image is proportional. 

You can place a value in Border, HSpace, and VSpace to add padding.

Alignment allows for placement of the image to the right or left of the text. If you wish to center the image, simply leave "Alignment" as <not set>, then use "Center" from the tool bar.


CKEDITOR Quick Reference

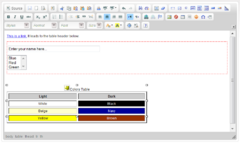
Below you will find an overview of all features available in the default CKEditor toolbar.

Working with a Document

Toolbar Button Description
Source View or edit the source code of the document (for advanced users). See Document Source.
Save Save the contents of CKEditor and submit its data to the server, when CKEditor is placed inside an HTML form. See Saving Content.
New Page Clear the editing area and create a new page. See Creating a New Page.
Preview Show a preview of the document in the shape that will be displayed to end users. See Document Preview.
Templates Select a layout template. See Templates.
Cut Cut the selected text fragment to the clipboard. See Cut.
Copy Copy the selected text fragment to the clipboard. See Copy.
Paste Paste content copied to the clipboard along with formatting. See Paste.
Paste as plain text Paste content copied to the clipboard without formatting. See Paste as Plain Text.
Paste from Word Paste content copied from Microsoft Word or similar applications along with formatting. See Paste from Word.
Print Print document contents. See Printing.
Insert Page Break for Printing Insert a page break. This only impacts the printed version. See Page Breaks.
Check Spelling Spell Check As You Type Check spelling of the document text or turn on the Spell Check As You Type (SCAYT) feature. See Spell Checking.
Undo Redo Undo or redo the most recent action performed. See Undo and Redo.
Find Find a word or phrase in the document. See Find.
Replace Find and replace a word or phrase in the document. See Replace.
Select All Select all contents of the document. See Text Selection.
Remove Format Remove the formatting of the selected text. See Remove Format.
Maximize Maximize the editor in the browser window. See Resizing and Maximizing CKEditor.
Show Blocks Highlight all block-level elements in the document. See Show Blocks.
About CKEditor Show information about CKEditor. See CKEditor Version.

Text Styling

Toolbar Button Description
Bold Italic Underline Strike Through Apply bold, italic, underline or strike-through formatting to the text. See Bold, Italic, Underline, and Strike-through.
Subscript Superscript Apply superscript or subscript formatting to the text. See Subscript and Superscript.
Formatting Styles Apply pre-defined combinations of various formatting options to block and inline elements. See Formatting Styles.
Paragraph Format Apply pre-defined block-level combinations of various formatting options. See Paragraph Format.
Font Name Change the typeface of the text. See Font Name.
Font Size Change the font size of the text. See Font Size.
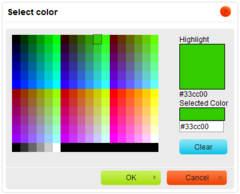
Text Color Change the color of the text. See Text Color.
Background Color Change the background color of the text. See Background Color.


Text Layout

Toolbar Button Description
Decrease Indent Increase Indent Increase or decrease text indentation. See Text Indentation.
Block Quote Format a block of text as indented quotation. See Block Quote.
Create Div Container Create a new divelement in document source. See Creating Div Container.
Align Left Center Align Right Justify‎ Set text alignment (left, centered, right or justified). See Text Alignment.
Text direction from left to right Text direction from right to left Set text direction as from left to right (default value for most Western languages) or from right to left (languages like Arabic, Persian, Hebrew).
Insert Horizontal Line Insert a divider line (horizontal rule) into the document. See Horizontal Line.

Rich Text

Toolbar Button Description
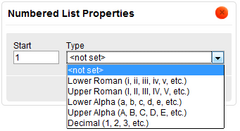
Insert/Remove Numbered List Insert/Remove Bulleted List Create a numbered or bulleted list. See Creating Lists.
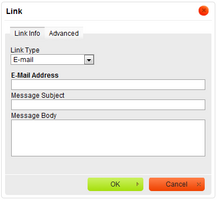
Link Unlink Create or remove a hyperlink in the text. These features may also be used to manage file uploads and links to files on the web server. See Links, E-Mails and Anchors.
Anchor Insert a link anchor to the text. See Anchors.
Image Insert an image into the document. See Inserting Images.
Flash Insert an Adobe Flash object into the document. See Inserting Flash.
Table Create a table with the defined number of columns and rows. See Creating Tables.
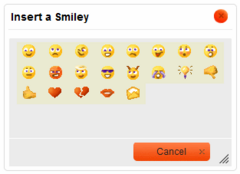
Smiley Insert an emoticon image (smiley or icon). See Inserting Smileys.
Insert Special Character Insert a special character or symbol. See Inserting Special Characters.
IFrame Insert an inline frame (iframe). See Inserting IFrames.

Form Elements

Toolbar Button Description
Form Insert a new form into the document. See Creating Forms.
Checkbox Insert a checkbox into the document form. See Checkbox.
Radio Button Insert a radio button into the document form. See Radio Button.
Text Field Insert a text field into the document form. See Text Field.
Textarea Insert a multi-line text area into the document form. See Textarea.
Selection Field Insert a selection field into the document form. See Selection Field.
Button Insert a button into the document form. See Button.
Image Button Insert an image button into the document form. See Image Button.
Hidden Field Insert a hidden field into the document form. See Hidden Field.